 HOME >> PROJECTS
MIDI LOOPER SEQUENCER
DIY PROJECTS
Is it a looper, is it a sequencer? Well I don’t really know. But, it is a super tool for building music from scratch.
The idea of the MIDI looper/sequencer came when I was interested to buy a Arturia Keystep … but I really didn’t like their tiny keyboards. So the goal here was to make something that could behave like the keystep, but in a box, without a tiny keyboard. This way, I could use my own keyboard.
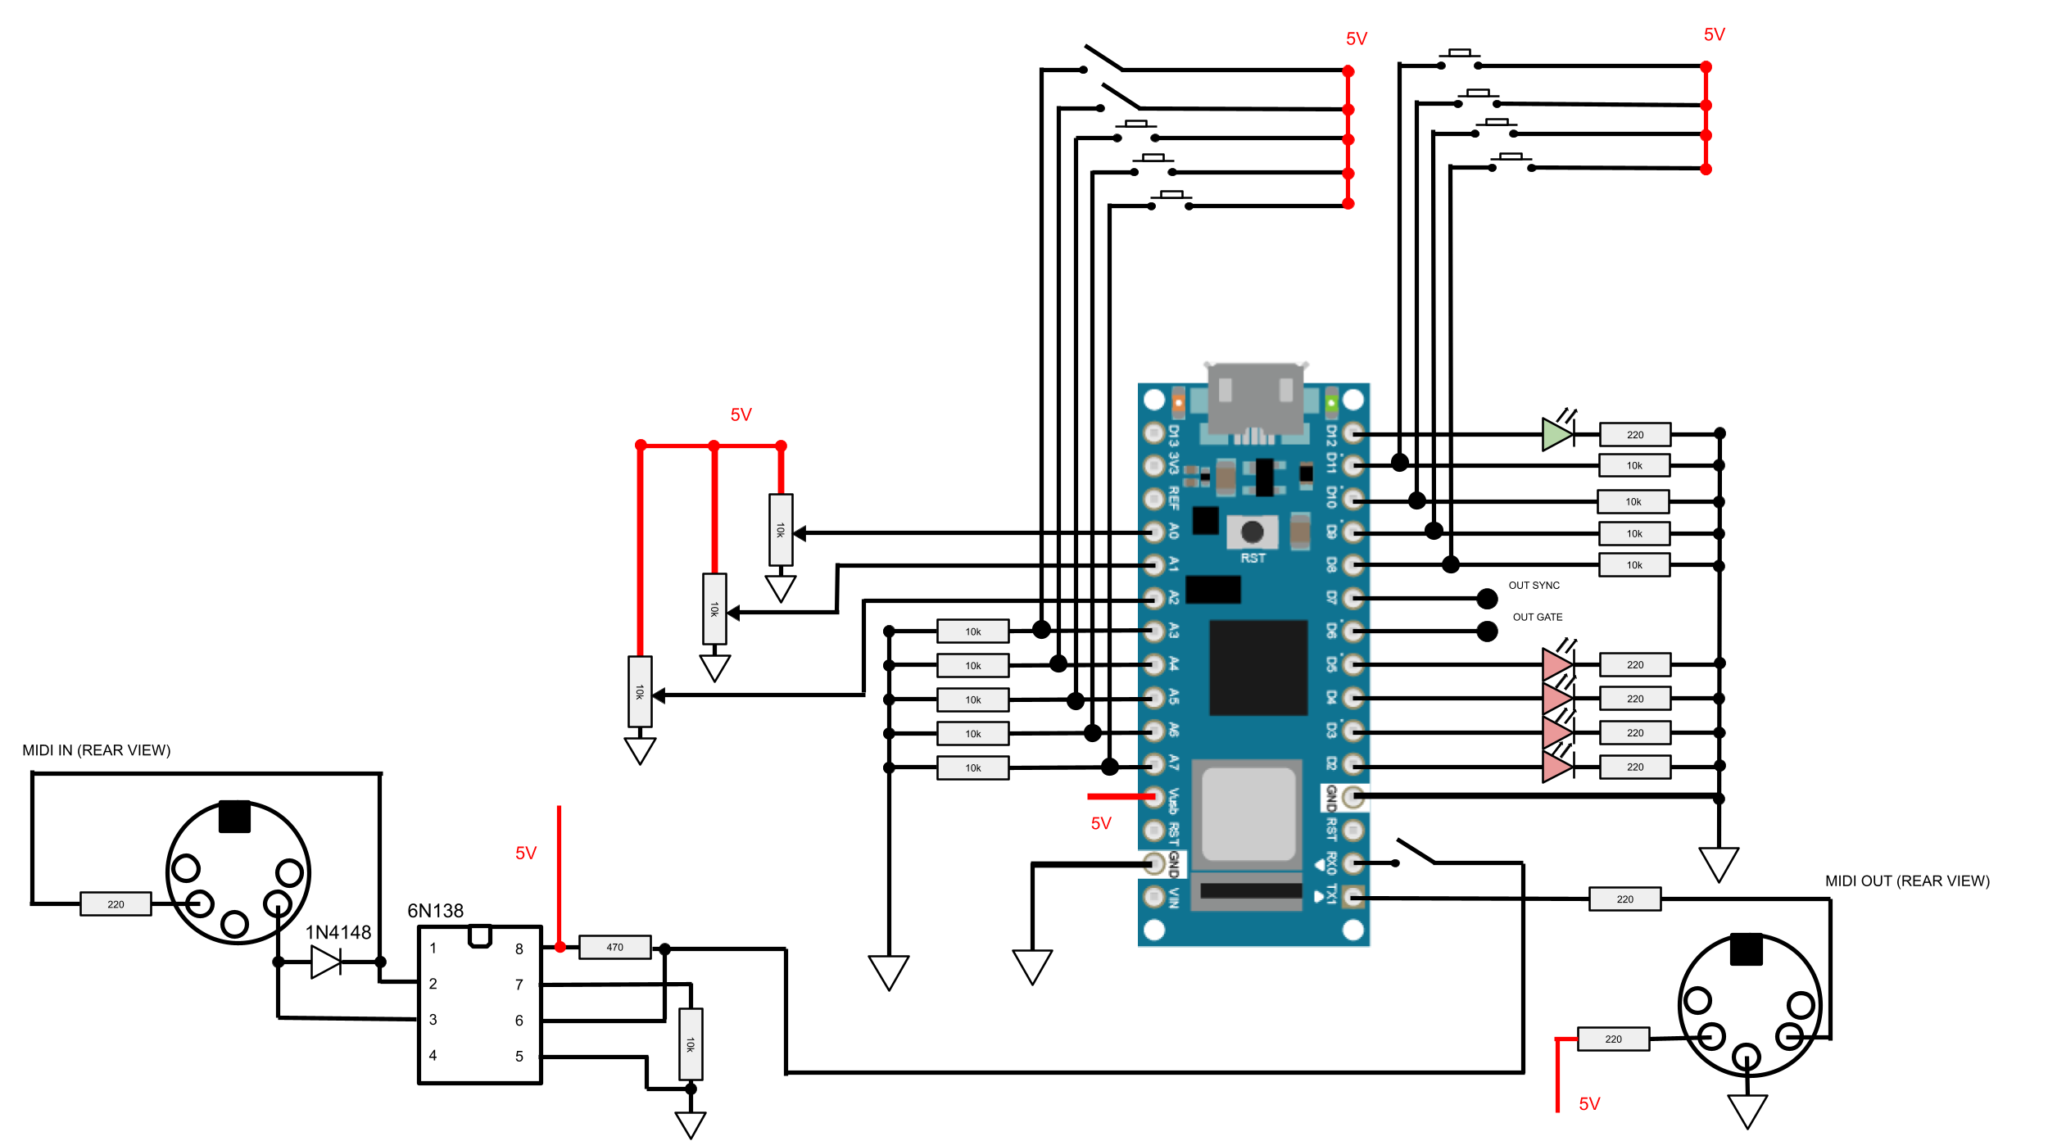
1* Arduino Nano
1* 6N138 Octocoupler
1* 1N4148 diode
5* LED (I choose 4 for the channel buttons, and 1 green for the beat … but you do whatever you want! )
3* 10k potentiometer (I think you can use 50k or 100k, it shouldn’t make any difference …)
8* 220 ohm resistors
10* 10k resistors
7* push buttons
3* switches
2* jack female socket
2* MIDI female sockets
Here is the list arduino’s pin & their purposes :
D2 : LED channel 1
D3 : LED channel 2
D4 : LED channel 3
D5 : LED channel 4
D6 : CV gate output
D7 : CV sync output
D8 : channel 1 button
D9 : channel 2 button
D10 : channel 3 button
D11 : channel 4 button
D12 : LED beat
A0 : tempo potentiometer
A1 : bar count potentiometer
A2 : step count potentiometer
A3 : MIDI thru switch
A4 : transposition switch
A5 : start/stop button
A6 : erase button
A7 : shift button
/!\ – There’s a switch at the RX0 pin of the Arduino Nano. THIS IS SOMETHING REALLY IMPORTANT – when the switch is ON, it allows you to play normally with the device, but when the switch is OFF, it allows you to upload a new code inside the Arduino. Don’t forget to add this switch if you want to update the code inside the Arduino!
BUT, …. HOW DOES IT WORKS ?
The MIDI looper/sequencer contains up to 128 steps for MIDI notes on 4 channels. By connecting your MIDI keyboard on the input, pressing the “PLAY” button on pushing the note you will record a sequence (or a loop, if you prefer) which will be played for ever and ever … until you erase it.
There is few limitations. Because a lack of times … or a lack of memory in the Arduino Nano … or because I’m too lazy. But limitations are good, cause it’s forcing you to get creative. Right?
– There is “only” 4 channels, which is enough I think for any bleeps and bloops.
– The sequences are mono. It means that one step can only record one note (per channel, of course). If you play another note over one other, it will be replaced.
– There is no note length. Each note is one step and that’s all! I personally manage the length of my notes with the ADSR of my synths.
– The velocity is not recorded. It means that the velocity will always be 127 for any note recorded.
When you record a note, it is automatically quantized to the next step. And what you will hear is the next step playing. This can be a little odd at first, but it allows you to be always on sync. Maybe a more “common” quantization process could be implemented in a next version … I said “maybe”.
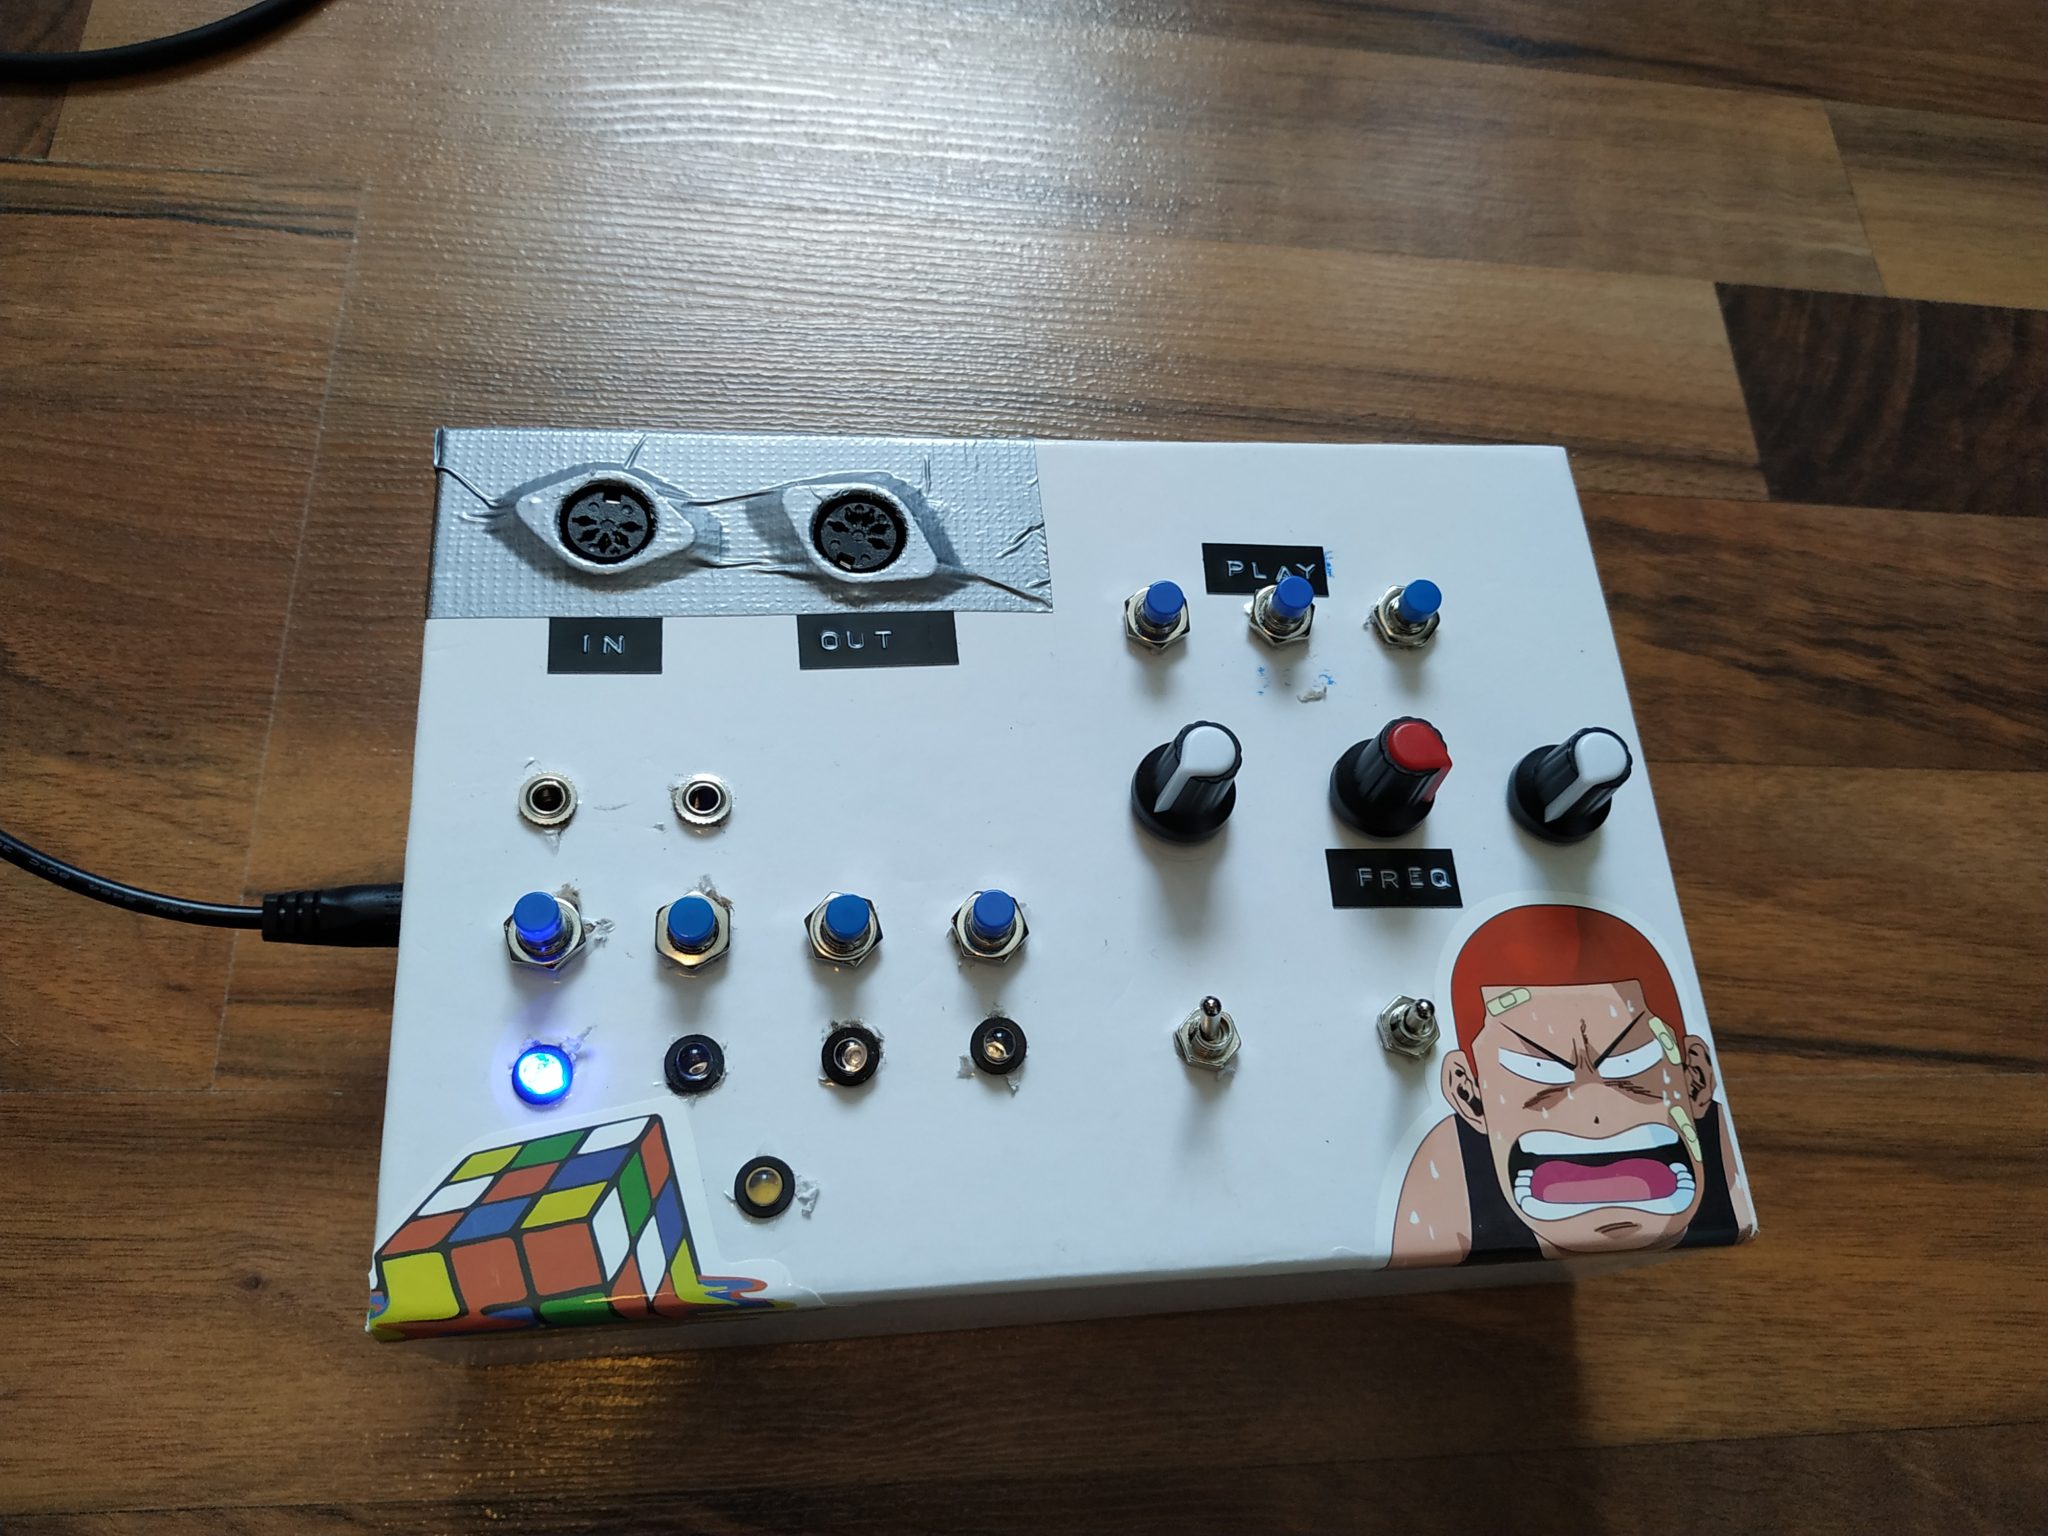
Here’s the explanation of each switch/knob/outputs/LEDs :
[SWITCH CHANNEL 1,2,3,4 / LED CHANNEL 1,2,3,4]
Choose the channel you want to record or to tweak. The Led display which channel is currently chosen.
[PLAY/STOP BUTTON]
Well, obviously, it starts and stop the sequence.
While the sequence is playing, if you press this button while you keep the SHIFT button pressed, the sequence will restart at the first step. It’s a kind of “cue” button.
[ERASE]
When pressing the button, the next notes played on the current channel will be erased. It’s like an eraser. You can just erase a few notes this way and not your complete sequence.
If you press ERASE while pressing SHIFT, it will erase all the steps of the sequence. Kind of “CLEAR ALL”, but on the current channel. There’s no way (right now) to erase ALL the notes on ALL the channels (There’s an easy way to that, just POWER off and POWER on !)
[TEMPO KNOB]
Change the tempo, yeah! Minimum is 40 I think, maximum is 220. You could easily tweak those value in the code if you wanna make some fast hardcore music.
[BAR COUNT & STEP COUNT KNOBS]
This knob allow you to change the number of bars, between 1 & 8, and the number of step per bar, between 1 & 16. When you are changing the value, the channel LEDs will display the number in an inverted binary format ( cause there’s no screen to let you know the number you are choosing ) : for instance, 1000 for value 1, 0100 for value 2, 1100 for value 3 … you get the idea. When you reach value 16 for the step count knob, all the LED are shut down.
[MIDI THRU SWITCH]
When the switch is ON, the MIDI is playing through the box and the notes are not recorded anymore. This is useful if you want to make a big lead solo over the incredible sequence you just recorded!
BUT : the MIDI channel that you will perform in, will be the channel of the keyboard, not the channel of the MIDI looper/sequencer.
[TRANSPOSITION SWITCH]
Transpose the sequence on the current channel by pressing a note on the keyboard. The middle note is C4, so if you press a B3, the sequence will be transposed 1 semitone down. If you press a D4, the sequence will be transposed 2 semitone up. You get the idea.
[SHIFT BUTTON]
As seen earlier, it extends the PLAY and the ERASE buttons.
ALSO if you press CHANNEL 1 button while SHIFT is pressed, you will fill all the 128 steps available with the current sequence you have. For instance if you have 1 bars of 16 steps and you do this combination of buttons, those 16 steps will be repeated on all the other steps available in the sequencer, for every channels. Useful for repeating & extending the length of a sequence.
[MIDI IN & MIDI OUT]
You know what to do, right?
[SYNC OUT]
When the sequencer is playing, it will send CV sync signal for synchronizing other synths and sequencers.
[GATE OUT]
When the sequencer is playing, it will send CV gate signal at each step. This is something that I needed in order to synchronize my DIY modular synthesizer BUT this is really optional if you don’t need it!
[MIDI SYNC MESSAGES]
The MIDI looper / sequencer sends MIDI SYNC messages! Such as START, STOP and SYNCED TEMPO. And it also receives them! You can synchronise the tempo with other devices this way!
AND, … WHAT’S NEXT
This project is at its first iteration! I want to make a new one with more features and a LCD screen to display some useful stuff, like an “HELLO” message when you power on the device (or some other useful stuff, like displaying the value of the bars or steps when you move the knobs …).
Adding some memory in a SD card in order to save your sequences could be very nice!
I also recently discovered (thanks to the amazing people from the LMNC forum) that I could get over all of my PULL-DOWN resistors by tweaking the code a little bit. Also, adding op-amp buffers to the SYNC and GATE output wouldn’t be a bad thing in order to protect the Arduino’s pins.
If you have an idea about a nice little feature that could be added, please drop me a mail (see the contact page of this website).
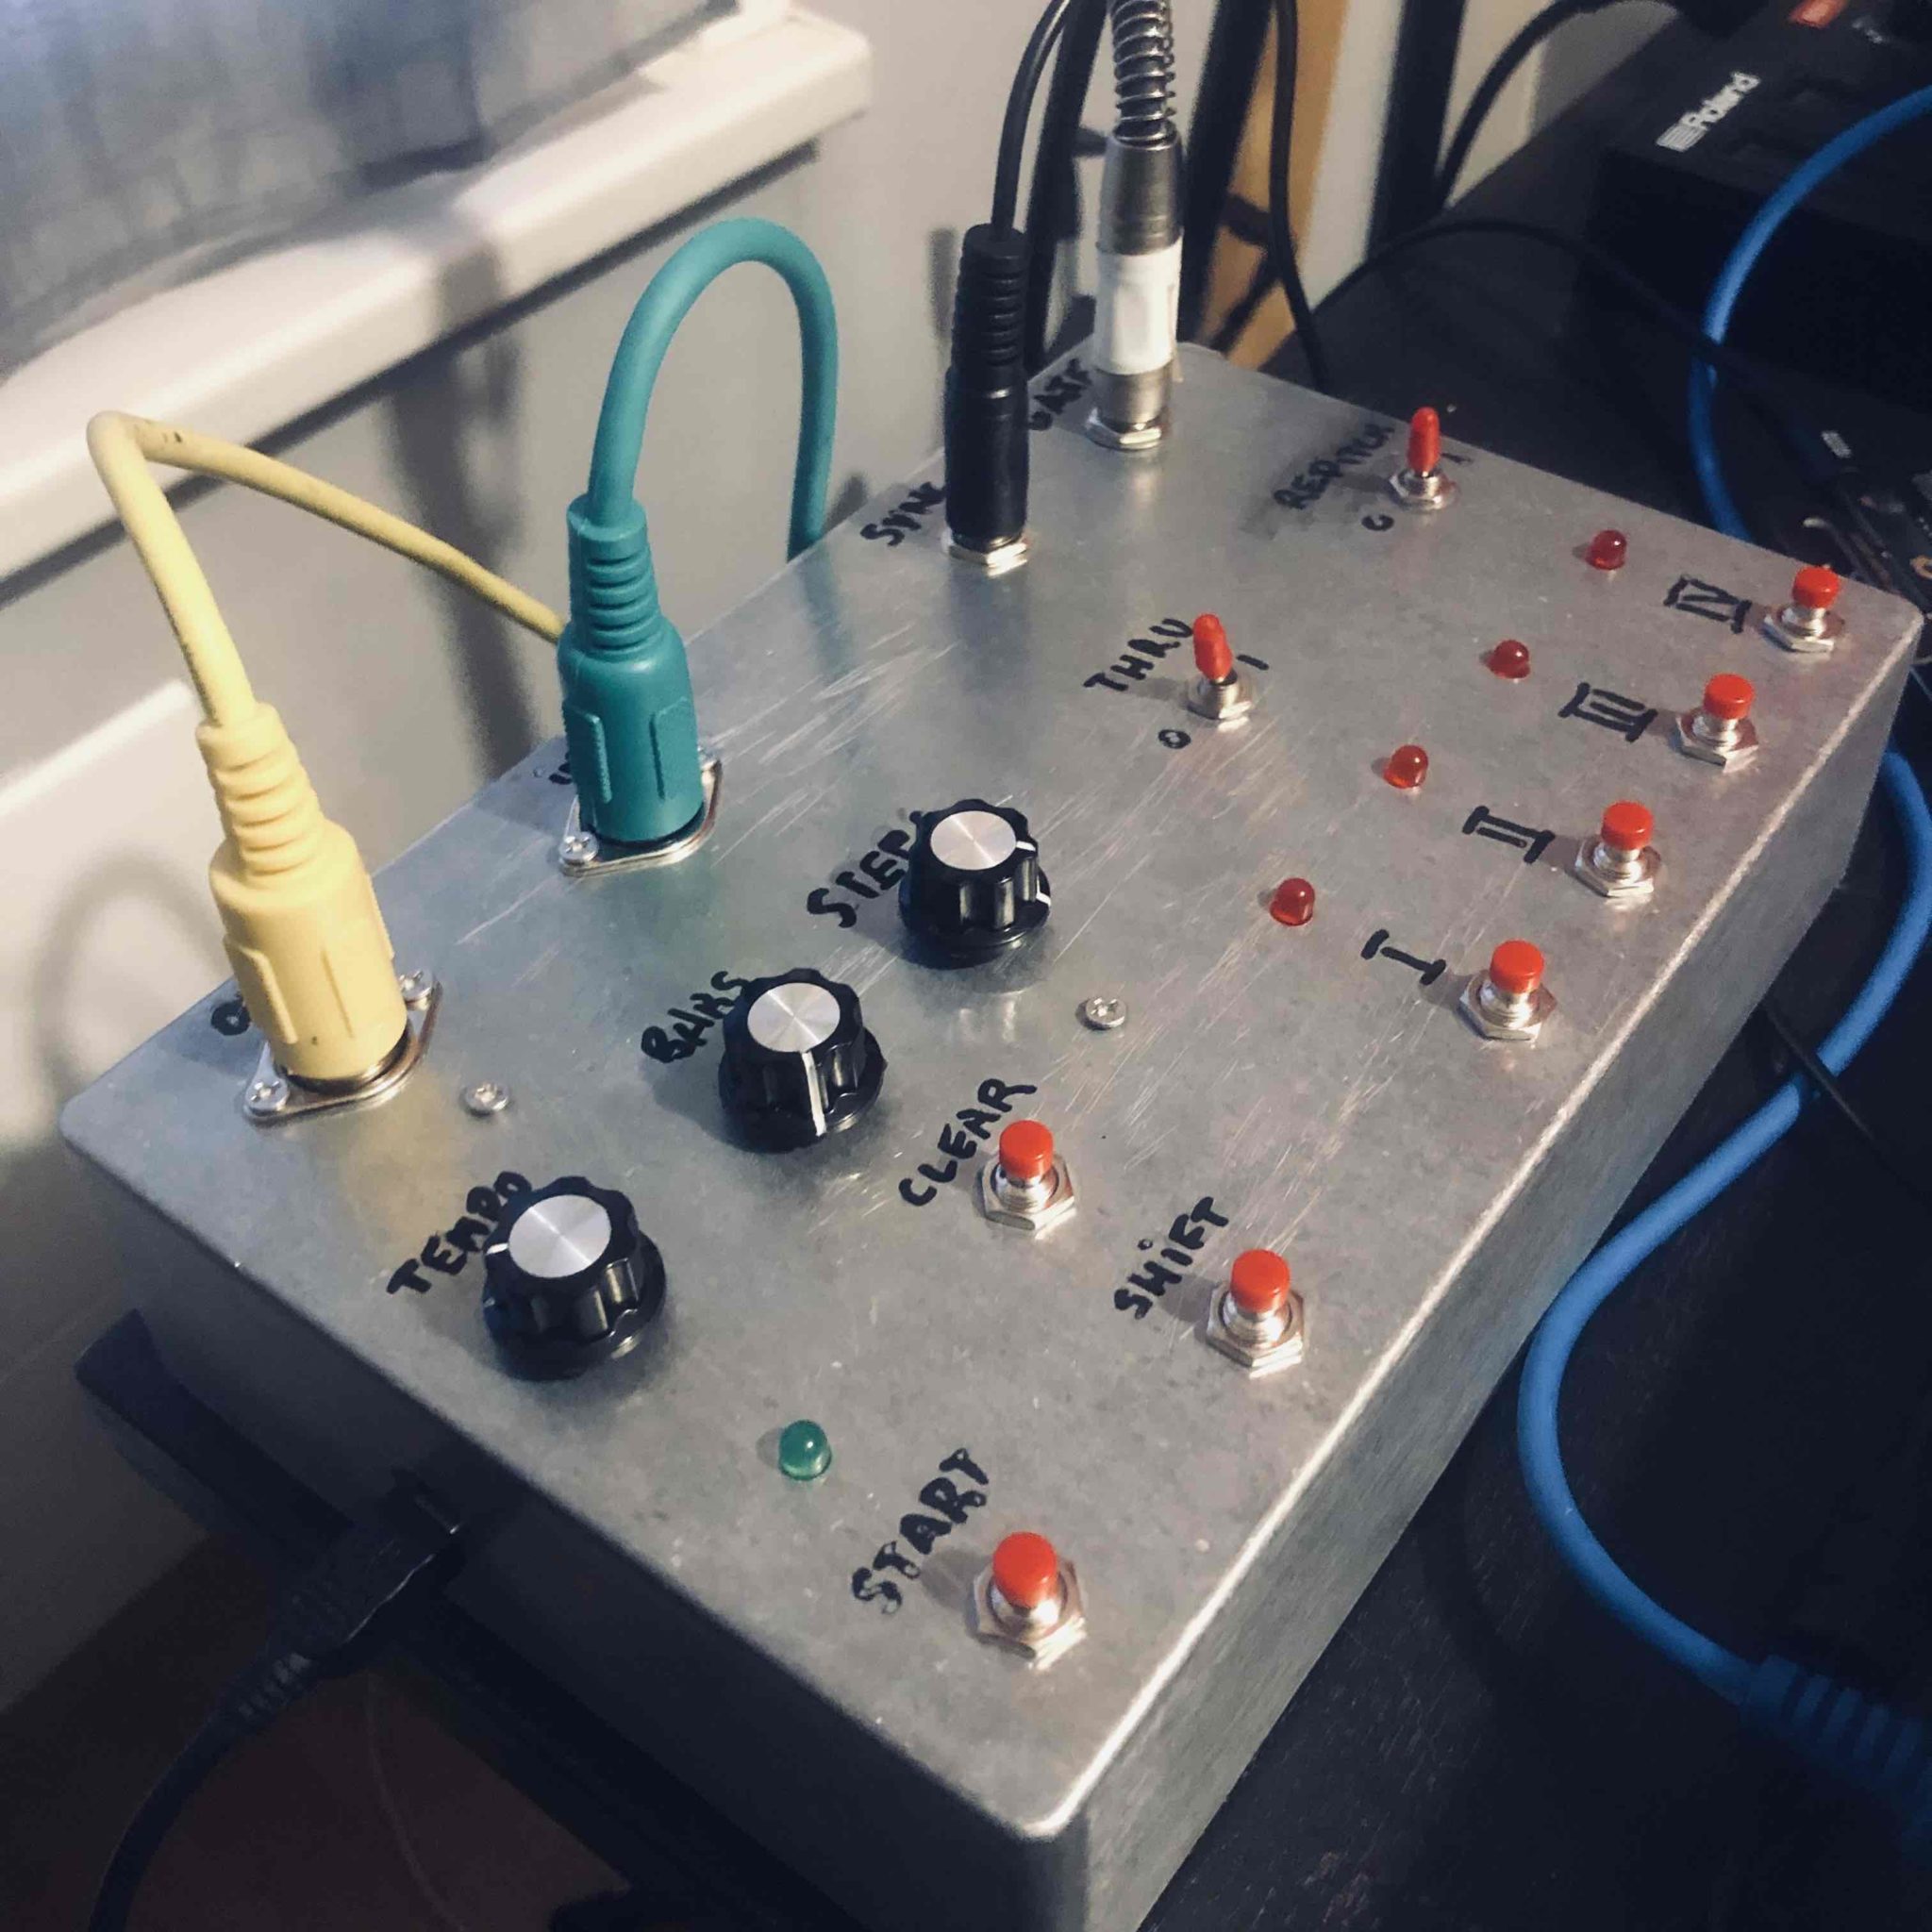
I want to thanks a lot Knopsl from Reddit who helped me a lot by troubleshooting the first circuit I drawn! Here is its own creation :